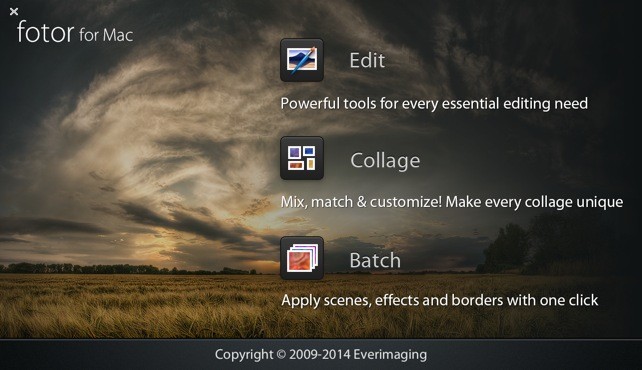
From the home menu, you can enter Fotor in the Edit, Collage, or Batch mode. Click on "Edit" to use powerful tools for every essential editing need, plus scenes, effects, borders, tilt-shift and more. Click on "Collage" to mix, match and customize a photo collage. And “Batch” lets you quickly process dozens of photos to save you time and effort.
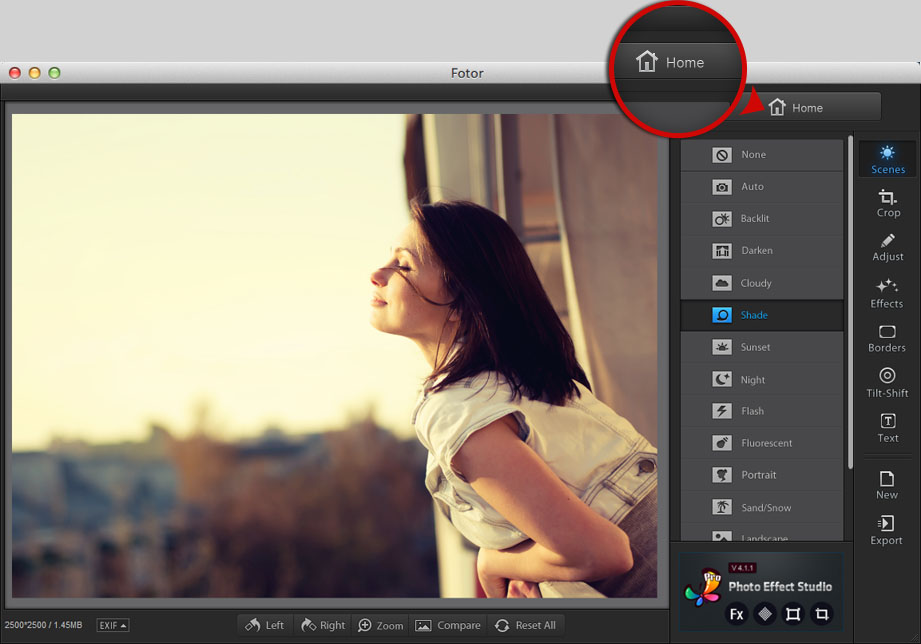
Whenever you are in the Edit, Collage, or Batch mode, simply click on the "Home" button on the upper right-hand side of your screen to return to the home menu and switch modes.
Drag your photo in or click on the big icon in the center of your screen to select the photo you would like to edit.
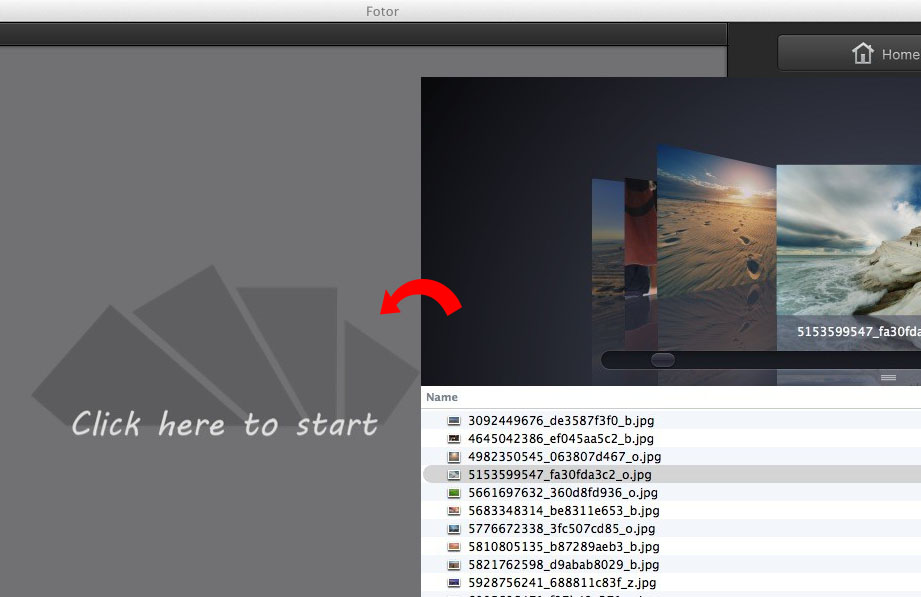
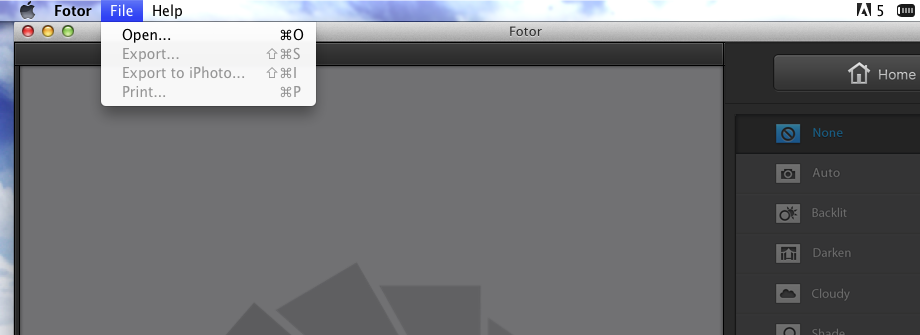
Click on "File" in the upper left-hand side of your workstation, choose "Open" from the menu and select an image file to upload into your workstation.
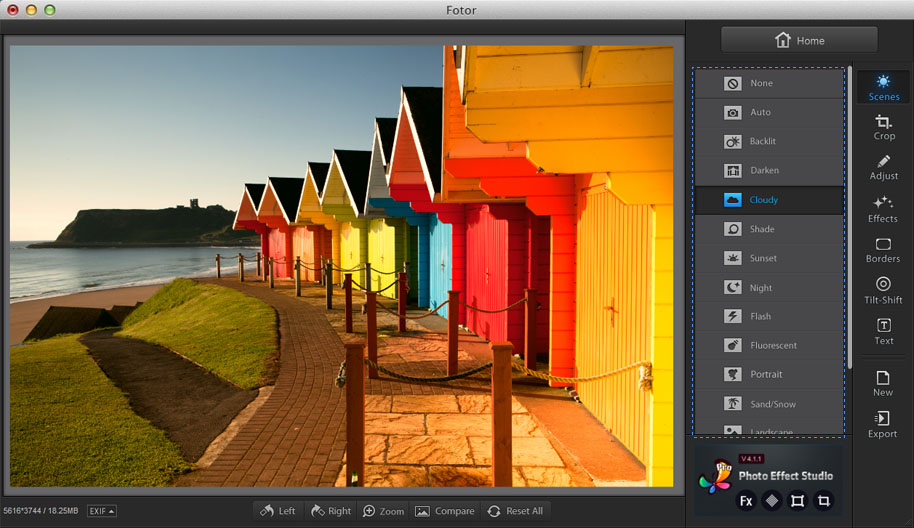
Click on the "Scenes" icon on the top right-hand side of your workstation. From the submenu you may select from a list of 13 different 1-Tap Enhance configurations, or scenes. Each scene has been labeled according to common photo-capturing conditions, including: Backlit, Darken, Cloudy, Shade, Sunset, Night, Flash, Fluorescent, Portrait, Sand/Snow, Landscape, Theatre, and Food. Feel free to experiment if you are uncertain which option is best, or select "Auto" from the top of the list and Fotor's advanced technology will conduct a pixel-by-pixel analysis of your photo for you.
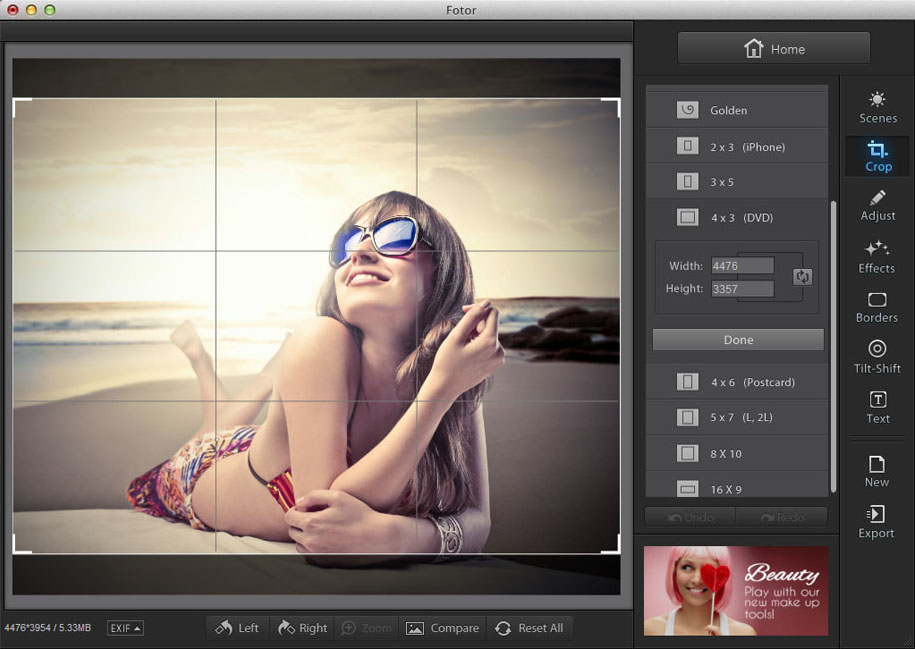
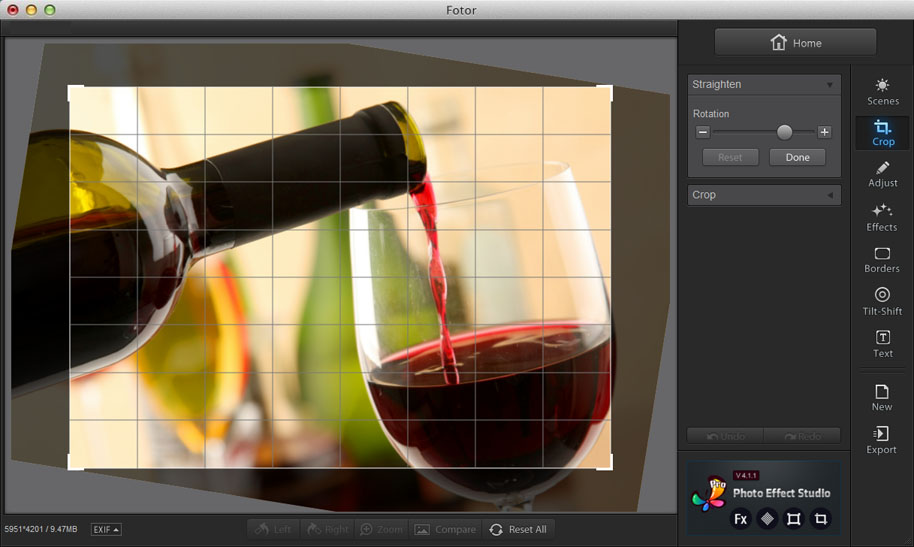
Click on the "Crop" icon on the top right-hand side of your workstation. Before you begin cropping, you can view the original width and height of your photo at the top of the submenu. To crop your image by hand, simply move your mouse over the outer boundaries and drag the lines up and down or from side-to-side. After you have changed the parameters, click anywhere inside of the highlighted portion of the image and drag the selected area to see how it looks.
Another way to crop your photo is to select from the list of aspect ratio presets. Notice that the "Freeform" option at the top of the list is selected by default. Cropping in Freeform mode allows you to customize the size of your photo for a specific purpose. For example, you can match the aspect ratio of a display for use as wallpapers or crop an image to fit your Facebook timeline.
To change the size of your image using numerical aspect ratios, simply click on the box to the right of the width and height fields and type any value. You can also change the direction of the crop by clicking on the small icon with two circular arrows to the right of the width and height fields. Clicking this icon will change the orientation of your photo to have either a vertical or horizontal layout.
Besides "Freeform," you can also select "Original" "Golden" or "Square" from the list, each with default aspect ratio configurations. Remember that these values can be changed by entering different numbers in the width and height fields that appear under the option once it has been selected.
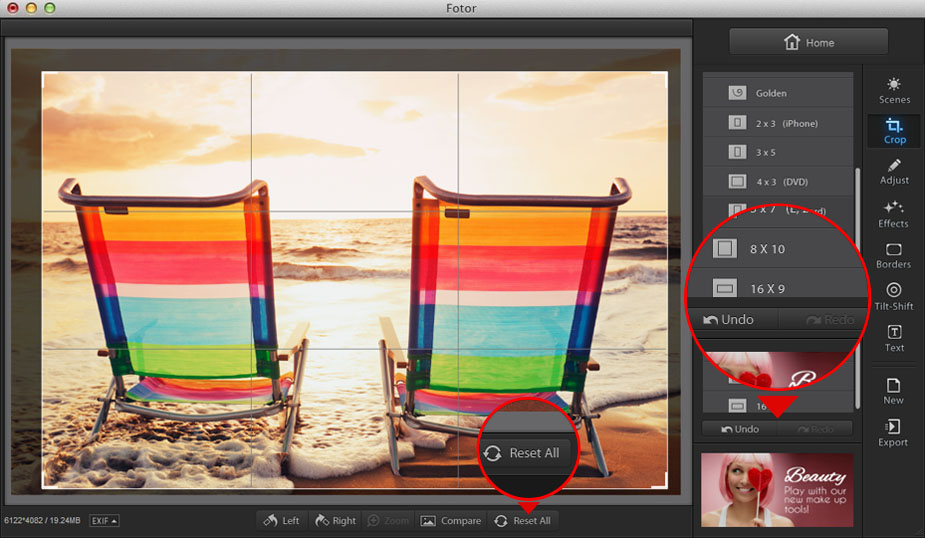
Below Freeform, Original, Square and Golden you will find the following commonly used aspect ratio presets: 2X3 (iPhone), 3X5, 4X3 (DVD), 4X6 (Postcard), 5X7 (L, 2L) 8X10 and 16X19. These presets make it easy to crop your photo when you don't want to hassle with manual adjustments.
Repeat these steps and move the cropped portion over different areas of your image until the highlighted area covers the part of your photo you would like to keep and the darkened area covers the part you would like to discard. When you have the perfect cut, select "Done" at the bottom right-hand side of the submenu and any changes will be locked-in. Remember that if you change your mind you can click on "Undo" or "Redo" at the bottom right-hand side of your workstation and continue cropping.
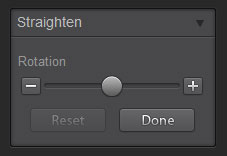
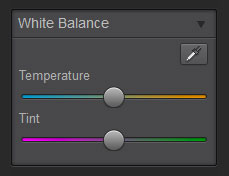
Click on the "Adjust" icon on the right-hand side of your workstation and select from a generous collection of editing tools in order to adjust the following:
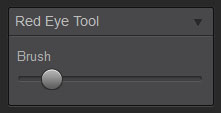
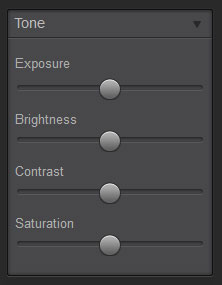
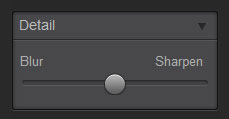

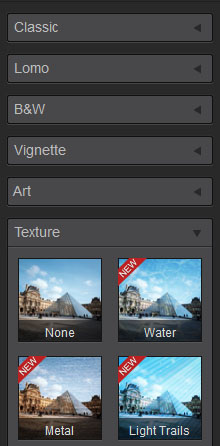
Click on the "Effects" icon on the right-hand side of your workstation. Select from the tabs at the top of the submenu to preview thumbnails of various effects in the following five categories: Classic, Lomo, B&W, Vignette, and Art.
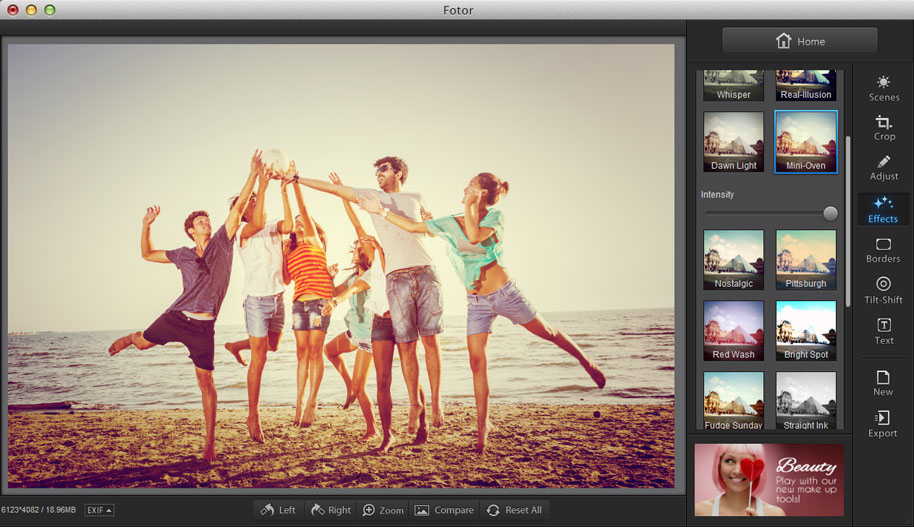
Once you select an Effect, you can adjust its intensity by moving the slider that appears. Move the slider to the right to crank the effect up or move it to the left to turn down the intensity of the effect.
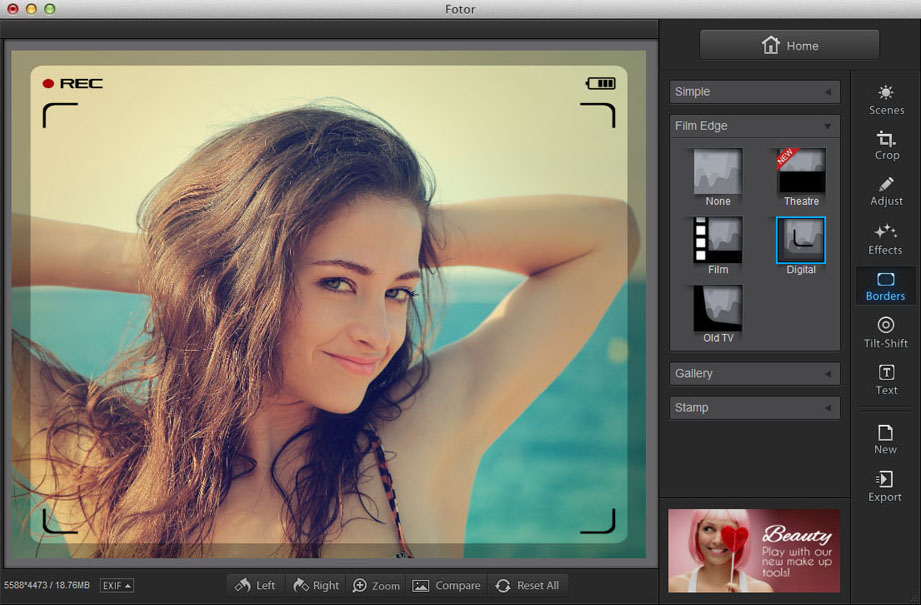
Select the "Borders" icon on the right-hand side of the viewer. There are 4 different categories of Borders: Simple, Film Edge, Gallery, and Stamp. You will see that there are 5 options for viewing the Borders. All, Favorites, New, Downloaded, and Cloud. “All” contains all of the Borders that we offer. The “Favorites” tab shows Borders that you have designated as favorites. You can designate a Border as a Favorite by clicking the star in the upper right-hand corner of any Border thumbnail. The next grouping is “New”, and that shows you new Borders that Fotor has created for you. After that is the “Downloaded” group. The first time that you use a Border, the Border is downloaded to your computer and it will remain there. This group shows you all the Borders that are stored locally on your computer. You do not need an internet connection to use these Borders. The last group, the “Cloud”, shows you Borders that have not been downloaded to your computer yet. If you are not connected to the Internet, you will not be able to use these Borders. You might find that you spend most of your time in the “All” or “Favorites” category.
Tilt-Shift allows you to focus selected areas of your photo while blurring the rest. Use this tool to highlight the subject of your photo, or to get a depth-of-field that is normally only possible from DLSR cameras. To get started, select the "Tilt-Shift" icon on the right-hand side of your workstation.
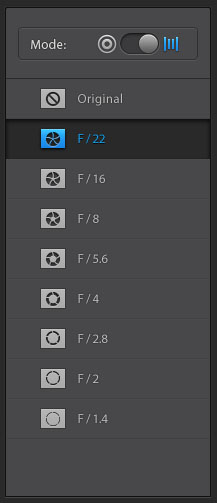
At the top of the submenu you can select the tilt-shift "Mode" or shape of the tool that you would like to use. Slide the "Mode" knob to the left if you would like to selectively focus circular areas, or drag the knob to the right in order to selectively focus across linear sections of your photo. Under either the circular or linear mode, choose from seven distinct apertures that correspond to different levels of intensity. F/16 at the top of the list results in the lowest level of blur effect, with each option after that increasing the strength of the blur.
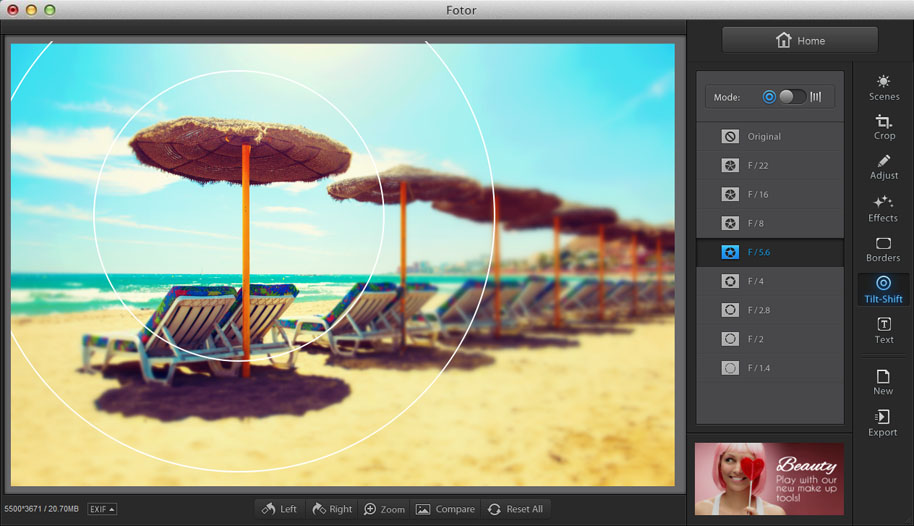
In the circular tilt-shift mode, click anywhere inside the circle and drag it over the portion of the photo that you would like to remain in-focus. You can also grab the parameter of the circle and move your mouse inwards to make the circular area smaller or expand the focused area by moving your mouse outwards.
In the linear tilt-shift mode, the default orientation of the selected area is vertical. To change the width of the area you would like to remain in focus, grab either the left or right side of the boundary, then move the line outward for a wider focused area or inward for more narrow coverage. To change the direction the linear path extends across your image; move your mouse anywhere over your image and then grab and hold the small circular-arrow that appears in the center. Drag your mouse in a slow, circular motion (clockwise or counterclockwise) to change the angle of the linear path, then stop and release your mouse when it is just right. To move the entire linear path of the selected area, click anywhere within the boundaries (except for the small circular icon directly in the center) and drag the selected area until it covers the part of your photo that you would like to remain in focus.
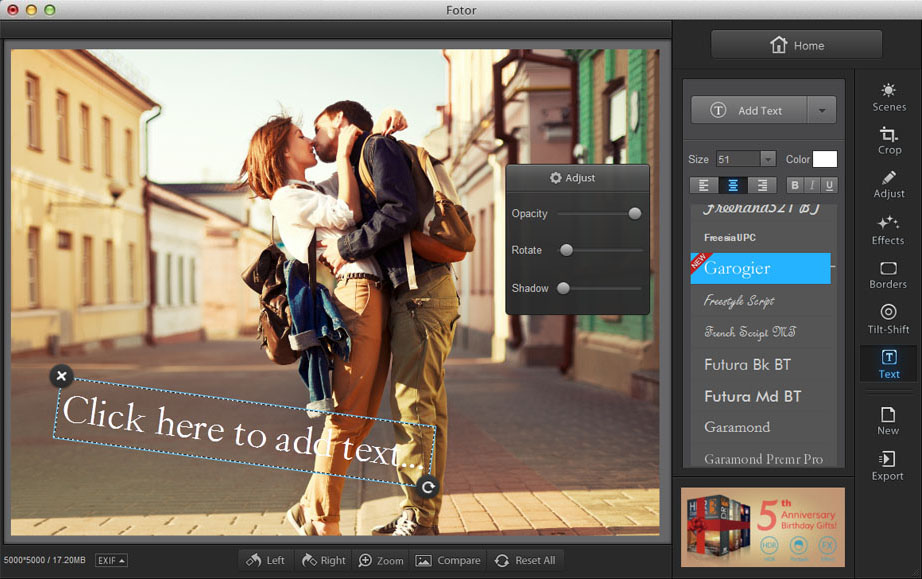
Got something to say? You can now add text to any photo. Lots of options to adjust the font, size and color of your text, plus move your words around till it looks perfect!
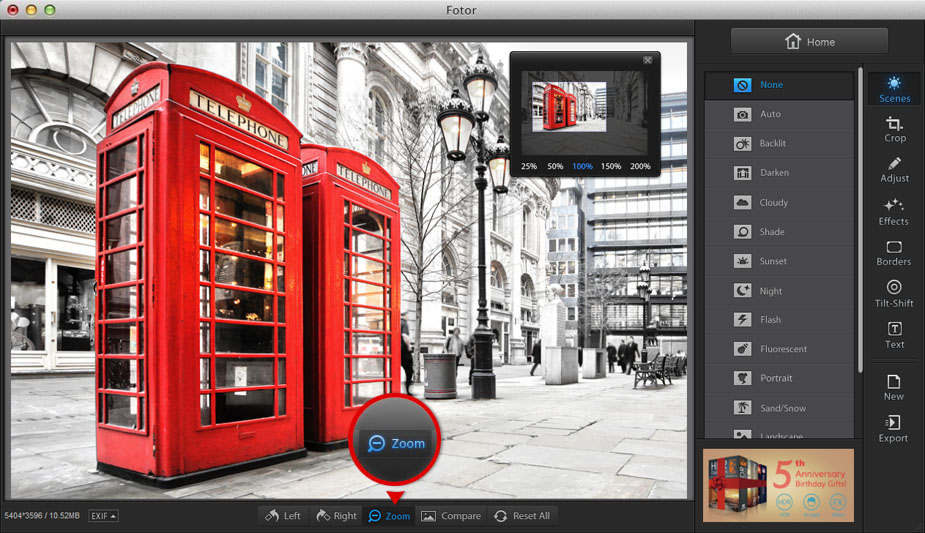
To zoom in and view any part of your photo during editing, select the magnifying glass at the bottom of the page. A small preview box will appear in the upper right-hand side of your workspace. At the bottom of this box you may select from five distinct levels of magnification. Choose 25%, 50%, 100%, 150% or 200% to zoom in or zoom out, and then click on your photo and drag it in any direction to pan across the surface of your image. Click in the "X" in the upper right-hand side of the preview box in order to return your image to its original size and continue. Note that the "Zoom" feature is available at every stage of editing except for the "Crops" mode.
Moving back and forward through different stages of your editing session is as simple as clicking on "Undo" and "Redo" at the bottom right-hand side of your workstation. By the way, "Undo" and "Redo" only available for "Adjust" and "Crop" function. You can also select the option to "Reset all" if you would like to clear all changes, but keep in mind that this clears the software's memory of any resent edits. Clicking on "Reset All" will prompt a dialog box to appear with, "Are you sure you want to clear all changes?" Remember that after you confirm "Yes" to this question, you will not be able to undo or redo changes. Of course if you select "Reset All" by mistake, you can simply click on "Cancel" or "No" and continue editing without resetting any changes.
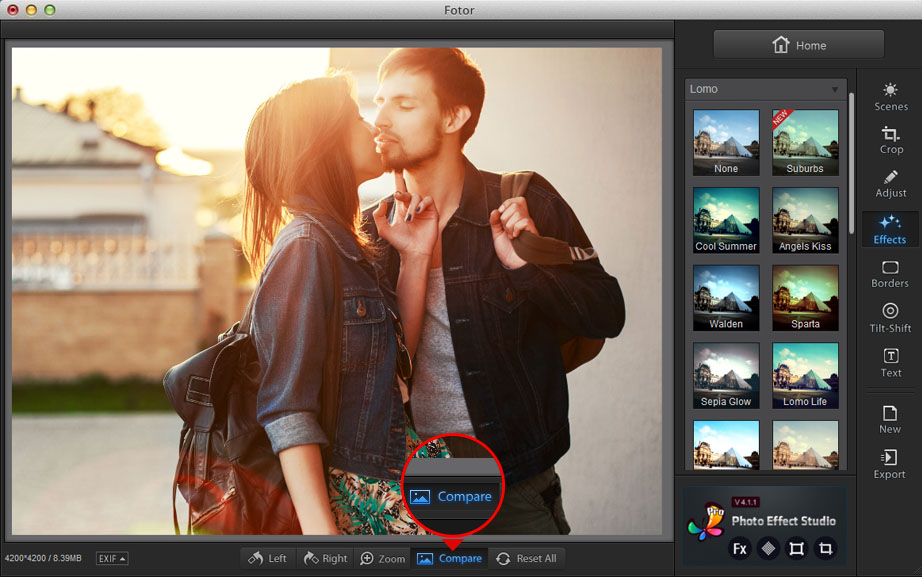
Click and hold the "Compare" button at the bottom of your workstation to view the original photo at any stage during your editing session.
Click on "Add" in the upper left-hand corner of your workstation to upload photos to the sidebar(or called photo basket). You may add up to 30 photos at one time. To remove individual photos, simply click on the "X" in the upper left-hand side of the individual photo. To remove all photos (both from your photo basket and from the template canvas) click on "Clear All" on the bottom left-hand side of your screen.
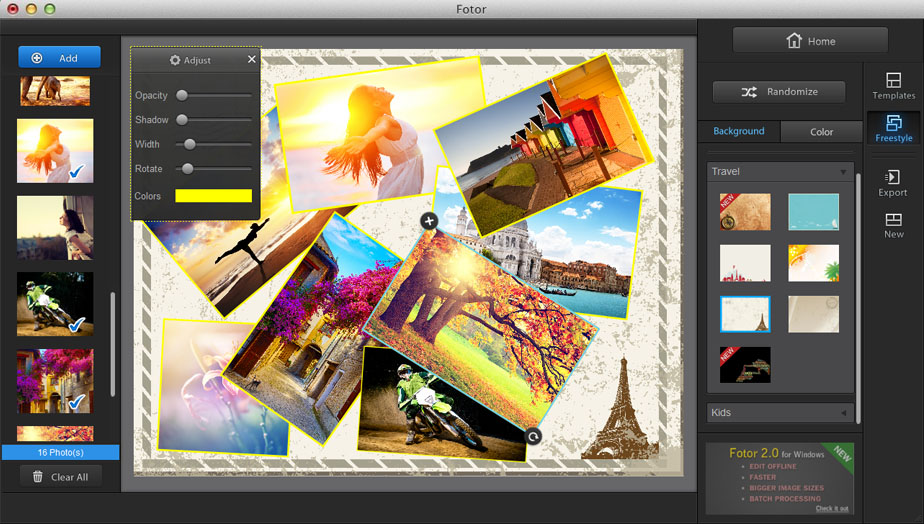
To begin your collage, drag photos from the photo basket on the left into the center of your template canvas, or double-click the photo with which you would like to collage. Notice that you can select from two modes of collage in the menu on the right: Template or Freestyle. In the Templates mode, you can select from 80 unique templates that have been designed for two to nine photos. In the Freestyle mode, you can move your photos around freely against the background color of your choice, or select one of our 22 unique background designs. While making your collage, you feel free to add photos from the photo basket, remove photos, and switch between the Templates and Freestyle mode.
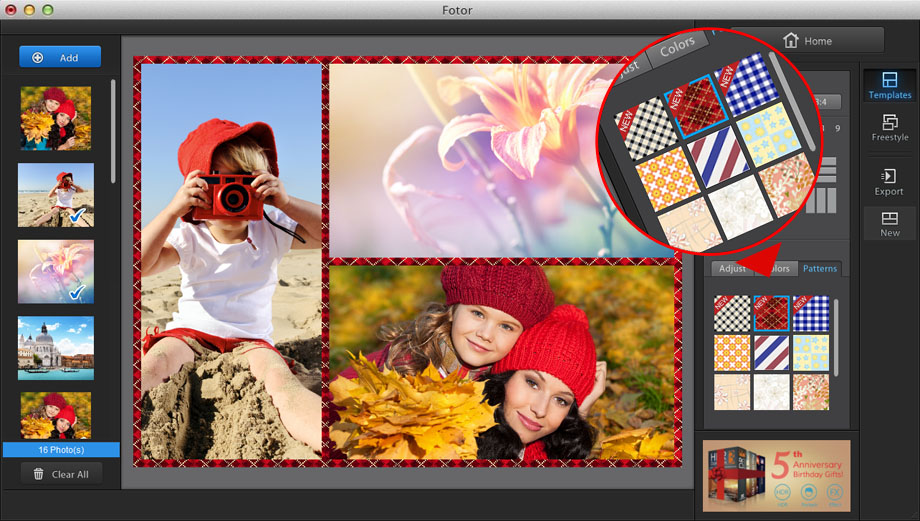
Click on "Templates" in the upper right-hand side of your screen to select from more than 80 templates layouts. Once in the Templates mode, you can select a ratio in the upper right-hand corner of your workstation to change the proportions of your collage. Pick a template for your collage based on the number of pictures you would like to use (up to 9 photos), or browse all of our templates for the layout you want to use. To add pictures to your collage, simply drag (or double-click) photos from the toolbar on the left into the available spaces in the template you have selected. Make adjustments to the corners, shadows, or width of your border by using the "Border" options on the bottom right-hand side of your workstation. From here you can also customize the color of your border, or select from 9 designer border patterns for the finishing touch.
Select "Freestyle" in the toolbar on the right-hand side of your screen. When in the Freestyle mode of collage, you can choose a solid color as your collage background or select from our unique background patterns. To start your collage, drag(or double click) pictures from the toolbar on the left side into the viewer. As individual photos are dropped into your canvas space, an "Adjust" box will appear with options to change the opacity or angle of your photo. From here, you can also adjust the shadow’s width and colors for the border of the selected photo. Rotate and change the size of the photo your photo by clicking on the circular icon in the bottom right-hand corner of a photo and moving your mouse. Click on the "X" in the upper left-hand side of individual photos to remove a single photo from your canvas. Once a photo has been removed from your canvas space, it will still be available in the toolbar on the left side of the viewer. Lastly, you can mix up the angle and order of photos against the background you have selected by clicking on the "Randomize" button on the upper right-hand side of the viewer or dragging the photos around until you get just the right look.
You will see that there are 5 options for viewing the Backgrounds. All, Favorites, New, Downloaded, and Cloud. “All” contains all of the Backgrounds that we offer. The “Favorites” tab shows Backgrounds that you have designated as favorites. You can designate a Backgrounds as a Favorite by clicking the star in the upper right-hand corner of any Background thumbnail. The next grouping is “New”, and that shows you new Backgrounds that Fotor has created for you. After that is the “Downloaded” group. The first time that you use a Background, the Background is downloaded to your computer and it will remain there. This group shows you all the Backgrounds that are stored locally on your computer. You do not need an internet connection to use these Backgrounds. The last group, the “Cloud”, shows you Backgrounds that have not been downloaded to your computer yet. If you are not connected to the Internet, you will not be able to use these Backgrounds. You might find that you spend most of your time in the “All” or “Favorites” category.
To export your edited photo, click on the "Export" button on the right-hand sidebar, and select whether you want to Save the photo to your computer or Share to one of the available social media networks.
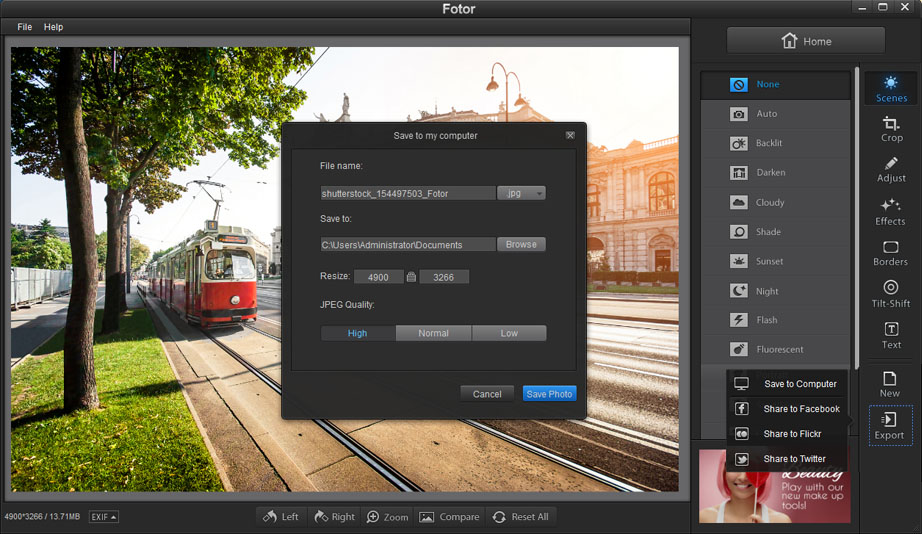
To Save to your computer, in the following dialog box you can choose a file name for your photo, as well as its dimension and quality (specifically for JPG format). You can select from .JPG, .PNG, .BMP, and .tiff as the type of file you want to save the photo as. Then click the "Browse" button to select where you want to save the photo.
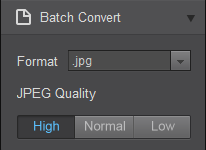
If you want to change the size of the photo, you can enter the pixel width and height in the "Resize" field. When you type a number in one of the two fields, the other one will change automatically to maintain the proportions of the photo. Finally, if you are saving the photo as a .JPG, you can select the .JPG quality. Click High, Normal, or Low as desired.
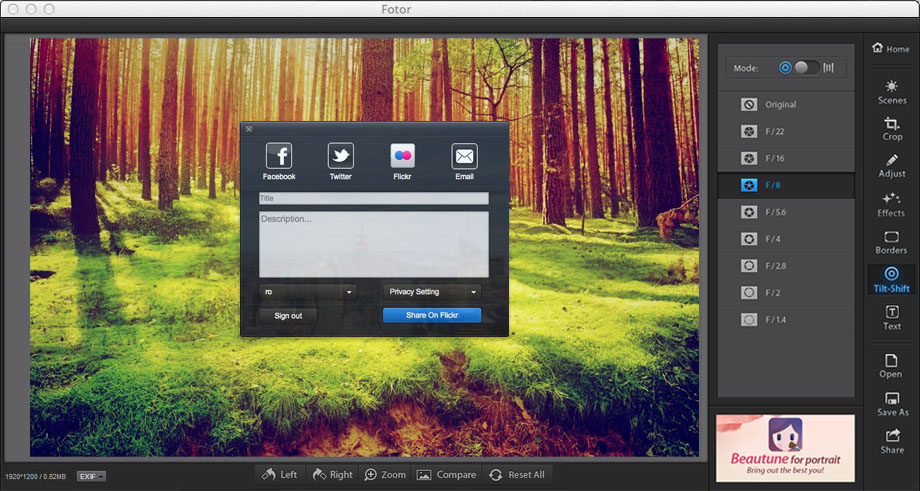
To Share to a social network, follow the instructions provided by the network after you select it from the “Export” button.
To Print, simply select “Print” from the “File” menu in the menu bar at the top of your screen.
New in Fotor 2.0 is the addition of Batch processing for Scenes, Effects, and Borders, as well as Batch resizing, renaming, and file conversion.

When you click Batch in the home menu, you are presented with the Batch Processing screen. The first step is to click “Select Folder” under Source to specify where the photos you want to process are located. Then do the same under Destination to specify where you would like the results to go. You can click Scenes, Effects, and Borders and decide which of these you would like to apply to your batch of photos.
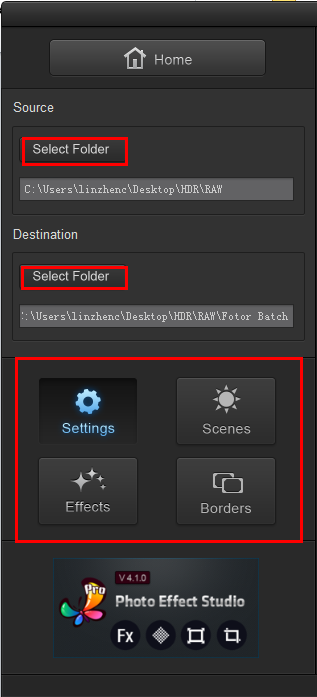
The “Settings” button is used if you want to change the size or file name of your photos, as well as specifying what file format the output will be in.
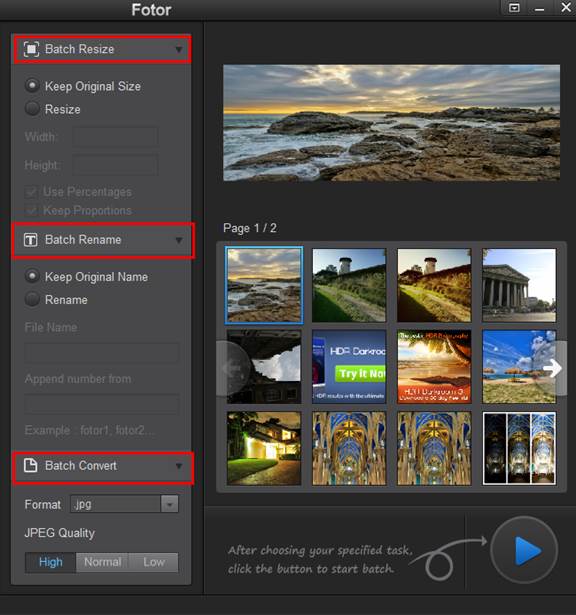
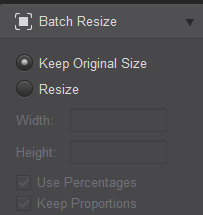
To resize a photo, click on “Batch Resize” and then “Resize”. You can then enter the new size that you would like the photos to be.
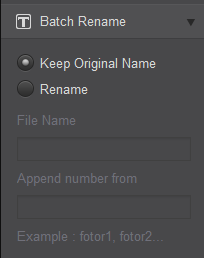
To rename the files, click “Batch Rename” and then “Rename”. Type the name you would like to use and what starting number you would like to append to the file names.
Lastly, under “Batch Convert” you can specify whether you want to save the files as .jpg, .png, .bmp, or .tiff.
